
Rim Light Photography Tricks:
Rim light photography is a technique used by photographers to create a stunning lighting effect that separates the subject from the background. By illuminating the edge of the subject, photographers can create a dramatic and eye-catching image that captures the viewer’s attention.
In this blog post, we will take a closer look at the art of rim light photography, including the science behind it, the equipment needed, and various techniques that you can use to create stunning images. We will cover the basics of rim lighting and then move on to more advanced topics, so whether you are a beginner or an experienced photographer, you are sure to find something valuable here.
Let’s dive in and explore the world of rim light photography together!
What is Rim Light Photography and Why is it Important?
Rim light photography is a technique in which a light source is placed behind the subject, illuminating the edge or rim of the subject. This technique creates a beautiful halo of light around the subject, separating it from the background and giving it a three-dimensional effect.
Rim lighting is important in photography because it adds depth and drama to your images. It can transform an ordinary image into something extraordinary, highlighting the subject and creating a striking visual impact. This technique can be used in a variety of genres, from portrait photography to product photography, and is a favorite among many professional photographers.
Understanding the basics of rim light photography is essential for any photographer looking to take their images to the next level. With the right equipment and techniques, you can create stunning and captivating images that will leave a lasting impression on your viewers. So, let’s dive deeper into the world of rim light photography and explore the various ways to master this technique.
Overview of the Blog Post
In this blog post, we will take a comprehensive look at rim light photography, covering everything from the basics to advanced techniques. Here’s what you can expect to learn:
- What rim light photography is and why it’s important
- The equipment needed for rim lighting
- How to set up your lighting for rim light photography
- Different techniques for creating rim lighting effects
- Tips for achieving the best results with rim lighting
- Inspiring examples of rim light photography
- Common mistakes to avoid when using rim lighting
Whether you’re a beginner or an experienced photographer, this post will provide you with the knowledge and skills needed to master the art of rim light photography. So let’s get started!
The Science of Rim Lighting
To understand rim lighting, we need to dive into the science behind it. Rim lighting occurs when a light source is placed behind the subject, and the light spills over the edges of the subject, creating a bright halo. This happens due to a phenomenon known as “edge diffraction.”
Edge diffraction occurs when light waves bend around the edges of an object, creating a shadow on one side and a bright edge on the other. This effect is most noticeable when the light source is close to the edge of the subject.
When using rim lighting, it’s essential to consider the distance and angle of the light source relative to the subject. Moving the light source closer or farther away can affect the intensity of the rim light. Similarly, adjusting the angle of the light source can change the position and shape of the rim light.
Understanding the science of rim lighting is crucial to achieve the desired effect and create stunning images. In the next section, we’ll discuss the equipment needed to create beautiful rim lighting effects.


The Science of Light and Shadows: Understanding How Rim Lighting Works
Light and shadow play a critical role in creating dramatic and compelling images. Understanding the science behind how light and shadow work can help us create stunning rim lighting effects.
When light hits an object, it can either reflect, refract, or be absorbed by it. The reflected light creates the brightness we see in the object, while the absorbed light creates the shadows. The angle at which the light hits the object affects the size and shape of the shadow.
In rim lighting, the light source is positioned behind the subject, creating a bright edge around the subject’s silhouette. The light spills over the edges, creating hair lights or halo lighting effect that separates the subject from the background. This effect is most noticeable in dark backgrounds.
To create rim lighting, we need to consider the position and angle of the light source. Placing the light source closer or farther away from the subject can affect the intensity of the rim light. Similarly, adjusting the angle of the light source can change the position and shape of the rim light.
Understanding the science of light and shadows is essential to creating stunning rim lighting effects. In the next section, we’ll discuss the equipment needed to create beautiful rim lighting.
Different Types of Light Stands for Rim Lighting: Pros and Cons
When it comes to rim light photography, choosing the right light stand is crucial. Here are some of the most common types of light stands that photographers use for rim lighting:
- C-Stands: These are sturdy and versatile stands that can be adjusted to different heights and positions. They are perfect for rim lighting, as they provide stability and support for heavier lighting equipment.
- Boom Stands: These stands have a long arm that extends horizontally, making them ideal for overhead rim lighting. They are also useful for shooting from unusual angles.
- Tripod Stands: These are lightweight and portable stands that are easy to set up and take down. They are perfect for photographers who need to travel with their equipment.
Each type of light stand has its pros and cons, depending on your specific needs. For example, a C-stand may be more stable and durable, but it’s also heavier and more difficult to transport. On the other hand, a tripod stand may be more lightweight and portable, but it may not be as stable in windy conditions.
Ultimately, the type of light stand you choose will depend on your shooting style, budget, and the specific requirements of your shoot.
Balancing Your Exposure for Rim Lighting: Tips and Techniques
When shooting with rim lighting, it’s important to balance the exposure of the subject with the rim light to achieve the desired effect. Here are some tips and techniques to help you balance your exposure:
- Use a light meter: A light meter can help you determine the correct exposure for your subject and rim light. This can save you time and help you achieve more consistent results.
- Adjust your aperture: A larger aperture (smaller f-number) will allow more light into the camera and can help balance the exposure between the subject and the rim light. However, be careful not to use too large an aperture, which can result in a shallow depth of field and blur the subject.
- Adjust your shutter speed: A slower shutter speed will allow more light into the camera and can help balance the exposure between the subject and the rim light. However, be careful not to use too slow a shutter speed, which can result in motion blur.
- Use exposure compensation: Many cameras have an exposure compensation feature that can be used to adjust the exposure of your photo. Use this feature to fine-tune the exposure of your subject and rim light.
- Use a reflector: A reflector can be used to bounce light onto the subject and balance the exposure with the rim light. This can help create a more even lighting effect.
By using these tips and techniques, you can achieve a well-balanced exposure for your rim lighting photos.
Setting Up Your Rim Lighting Equipment
Rim lighting is a versatile technique that can be achieved with various equipment setups. In this section, we will discuss the different ways you can set up your rim lighting equipment.
A. Light Sources for Rim Lighting There are different light sources that you can use to achieve rim lighting, including natural light, camera flashes, and studio lights. Each light source has its advantages and disadvantages, and we will discuss them in detail.
B. Light Stands and Mounts To achieve rim lighting, you need to position your lights at the right angle and height. Light stands and mounts can help you achieve this positioning, and we will discuss the different types available and their pros and cons.
C. Light Modifiers Light modifiers can be used to shape and control the light that is emitted from your light source. In this section, we will discuss the different types of light modifiers that you can use for rim lighting, such as reflectors, diffusers, and grids.
D. Setting Up Your Rim Lighting Equipment Once you have chosen your light source, stand or mount, and light modifiers, it’s time to set up your rim lighting equipment. We will provide step-by-step instructions on how to set up your equipment and position your lights to achieve the desired rim lighting effect.
Remember, setting up your equipment correctly is crucial for achieving the perfect rim lighting shot.
Setting Up Your Rim Lighting Equipment: Essential Gear and Tips
Setting up your rim lighting equipment is crucial to getting the perfect shot. You’ll need a few key pieces of gear, including a light stand, a light source, and modifiers like snoots or grids.
Here are some tips to keep in mind when setting up your rim lighting equipment:
- Place the light source on the opposite side of the subject from the camera.
- Use a snoot or grid to control the spread of the light and create a more defined edge.
- Use a light stand that’s sturdy enough to hold your equipment securely.
- Position the light stand so that the light is at the appropriate height and angle for the desired effect.
- Test your equipment and adjust the settings until you get the desired exposure and effect.
With the right equipment and setup, you can create stunning rim lighting that separates your subject from the background and adds depth and dimension to your photos.
Different Types of Light Stands for Rim Lighting: Pros and Cons
When it comes to setting up your rim lighting, the type of light stand you use is crucial. There are a variety of light stands available in the market, each with its own advantages and disadvantages.
The most common type of light stand used for rim lighting is a C-stand, also known as a Century stand. These stands are heavy-duty and have a wide base, making them sturdy and ideal for supporting heavier lighting equipment. Additionally, C-stands have an adjustable arm that can be positioned to various angles, allowing you to achieve different lighting effects.
Another type of light stand that can be used for rim lighting is a tripod stand. These stands are typically more lightweight and portable, making them great for outdoor shoots or when you need to move around frequently. However, they may not be as sturdy as C-stands, so you’ll need to take extra care when using heavier lighting equipment.
Finally, there are boom stands that can be used for rim lighting. These stands are similar to C-stands, but they have a longer and more flexible arm that can be adjusted to various angles. Boom stands are great for achieving precise lighting effects and can be used in combination with other stands for more complex setups.
Overall, the type of light stand you choose will depend on your specific needs and shooting conditions. It’s important to weigh the pros and cons of each type before making a decision.
Different Types of Camera Flash for Rim Lighting: Pros and Cons
When it comes to camera flashes, there are several types to choose from. Understanding the different types and their pros and cons can help you choose the best one for your rim lighting needs.
- Built-in Flash: Cameras often come with a built-in flash, but these can be limited in power and directionality. They are not recommended for rim lighting.
- External Hot Shoe Flash: These flashes mount to the camera’s hot shoe and can be tilted and swiveled for better control of the light. They are a good option for rim lighting but can be limited in power and range.
- Studio Strobe: These flashes are more powerful and versatile than external hot shoe flashes. They can be used with various modifiers like softboxes, reflectors, and beauty dishes, making them an excellent choice for professional rim lighting setups.
- Portable Speedlight: These are small and lightweight flashes that can be mounted on light stands, tripods, or used off-camera. They have a faster recycle time than studio strobes and can be used on-location, making them ideal for outdoor rim lighting setups.
Each type of flash has its own advantages and disadvantages, so it’s essential to choose the one that best suits your shooting needs.
For rim lighting, it’s essential to choose a flash with enough power and control to create the desired effect. A studio strobe or portable speedlight with a high guide number and adjustable power output can provide the necessary power and control for rim lighting.
Remember that investing in quality gear can make a significant difference in the quality of your photographs.
Techniques for Rim Light Photography
In this section, we will discuss some of the popular and effective techniques for achieving beautiful rim lighting in your photography.
Whether you’re a beginner or a professional photographer, these techniques will help you add depth, dimension, and drama to your images.
We will cover everything from basic techniques to advanced tips and tricks to help you take your rim lighting photography to the next level. So, let’s dive in!
Separating Your Subject with Rim Lighting: Techniques and Tips
Rim lighting is a great way to separate your subject from the background and give your photos a professional look. One technique for achieving this is to position your subject between the rim light and the camera, which will create a distinctive halo effect around the subject’s edges.
Another approach is to use a snoot or honeycomb grid to control the light spill and direct it precisely where you want it. In addition, you can experiment with different angles and distances of the light source to achieve the desired effect. Remember to balance your exposure and adjust your camera settings accordingly.
Achieving a Hair Light Effect with Rim Lighting: Step-by-Step Tutorial
Achieving a hair light effect with rim lighting can add dimension and depth to your subject, creating a more striking and memorable image. The key to this effect is positioning the rim light above and behind the subject, shining down on the hair.
In this step-by-step tutorial, we’ll cover the equipment and techniques needed to achieve a hair light effect, including how to position and adjust your lights, how to balance your exposure, and how to pose your subject to get the best results.
With these tips and tricks, you’ll be able to create stunning images with a professional-looking hair light effect.
Using Natural Light for Rim Lighting: Advantages and Techniques
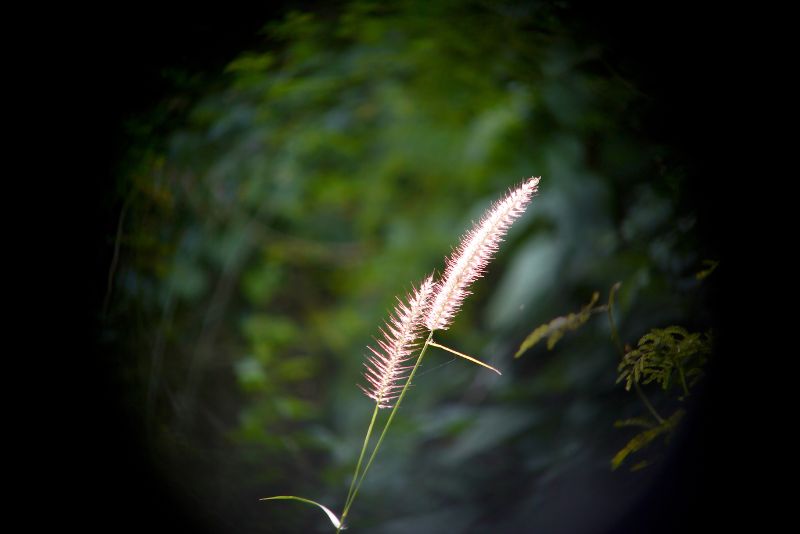
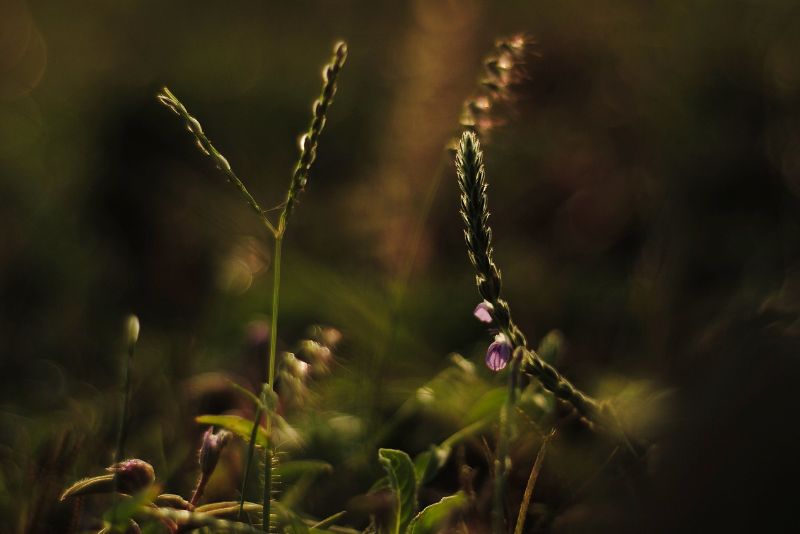
Rim lighting can be achieved not only with artificial lighting but also with natural light sources. Using natural light for rim lighting can produce a unique and organic look in your photos.
To use natural light for rim lighting, you need to position your subject in front of a light source such as the sun or a window. The light should be coming from behind or to the side of the subject to create the rim effect.
One of the advantages of using natural light for rim lighting is that it can be a cost-effective option since you don’t need to invest in lighting equipment. Additionally, natural light can produce a more natural-looking rim effect compared to artificial lighting.
However, using natural light for rim lighting can also be challenging since you’re reliant on the available light source, which can be unpredictable. To achieve consistent results, you may need to experiment with different angles, times of day, and weather conditions.
Using Camera Flash for Rim Lighting: Techniques and Best Practices
When using camera flash for rim lighting, it’s important to consider the direction and angle of the flash to achieve the desired effect. One common technique is to position the flash behind the subject and slightly to the side, creating a narrow band of light that outlines the subject’s silhouette.
Another technique is to use a reflector or bounce card to redirect and soften the light. It’s also essential to balance the exposure of the rim lighting with the rest of the scene, adjusting the flash power and camera settings as necessary. Finally, using off-camera flash and triggers can provide more flexibility and control over the lighting setup.
Advanced Rim Lighting Techniques for Professionals: Tips and Tricks
Rim lighting is a great way to add drama and depth to your photos, and there are many advanced techniques that professionals use to take their rim lighting to the next level. Here are some tips and tricks for advanced rim lighting techniques:
- Use multiple lights: While a single rim light portrait can be effective, using multiple lights can create a more complex and dynamic lighting setup. For example, you can use two rim lights, one on each side of your subject, to create a more dramatic and three-dimensional effect.
- Experiment with different angles: Varying the angle of your rim light can create different effects. Try angling the light so that it grazes the side of your subject’s face or body, or try positioning the light above or below your subject for a more unusual effect.
- Use colored gels: Adding colored gels to your rim lights can create a unique and striking effect. For example, you can use a blue gel to create a cool, moody effect, or a red gel for a warm, fiery effect.
- Combine rim lighting with other lighting techniques: Rim lighting can be combined with other lighting techniques, such as key lighting or fill lighting, to create a more complex and layered effect. Experiment with different lighting setups to find what works best for your subject and your style.
- Use different modifiers: Different modifiers, such as diffusers or grids, can be used to modify the quality and direction of your rim light. For example, using a grid can create a more focused and directional rim light, while using a diffuser can create a softer and more diffuse effect.
By experimenting with these advanced rim lighting techniques, you can take your photography to the next level and create images that are truly unique and striking.
How to Create a Halo Effect with Rim Lighting: Techniques and Ideas
Creating a halo effect with rim lighting can add a dramatic and ethereal look to your photographs. To achieve this effect, you’ll need to position your rim light behind and slightly above your subject’s head.
The rim light should be bright enough to create a halo-like glow around the edges of your subject’s hair or head. It’s important to ensure that the light is not too harsh and doesn’t create unwanted shadows or glare.
To further enhance the halo effect, you can use a hair light to illuminate your subject’s hair from above. This will create separation between your subject and the background, making the halo effect more pronounced.
It’s also important to consider the background when creating a halo effect with rim lighting. Using a plain or neutral-colored background will help emphasize the halo effect, while a busy or colorful background may distract from the overall effect.
Experiment with different angles, light intensities, and camera settings to achieve the perfect halo effect with rim lighting. With some practice and patience, you can create stunning and unique images that will make your subjects stand out.
Shooting Rim Lighting Photos with Continuous Lights: Tips and Strategies
Shooting rim lighting photos with continuous lights can be a great option for photographers who prefer a constant light source. One advantage of using continuous lights is that you can see the effects of the lighting in real-time, allowing you to adjust the placement and intensity of the lights as needed.
When using continuous lights for rim lighting, it’s important to consider the color temperature of the lights. You’ll want to choose lights with a color temperature that matches your camera’s white balance setting, or you can use gels to adjust the color temperature of the lights.
Another consideration when using continuous lights is the heat they generate. Make sure to choose lights that have a built-in cooling system or use external fans to prevent overheating.
To create rim lighting with continuous lights, position the lights behind and slightly to the sides of your subject, angling them towards the camera. Adjust the distance and intensity of the lights to achieve the desired effect.
One advantage of using continuous lights is the ability to use longer shutter speeds, which can create interesting motion blur effects. However, you’ll need to use a tripod or stabilize your camera to avoid camera shake.
Overall, shooting rim lighting photos with continuous lights can be a creative and effective technique, as long as you take the necessary precautions to ensure proper lighting and avoid potential issues with heat and camera shake.
Tips and Strategies for Shooting Rim Light Photography
In this section, we will provide tips and strategies to help you achieve stunning rim lighting photos. We will discuss how to prepare your subject and set up your equipment, as well as techniques for composing your shot and controlling your exposure. Additionally, we will explore creative ways to use rim lighting to enhance the mood and atmosphere of your photos. Whether you are a beginner or a professional photographer, these tips and strategies will help you take your rim lighting photography to the next level.
Finding Inspiration for Your Rim Lighting Photography: Tips and Strategies
One of the biggest challenges for any photographer is finding inspiration for their work. When it comes to rim lighting photography, there are many sources of inspiration that you can draw from.
First, look to other photographers who specialize in rim lighting photography. Browse their portfolios, study their techniques, and try to identify what makes their images stand out. You can also find inspiration from other genres of photography, such as portrait, landscape, or street photography. Try to identify how rim lighting can be incorporated into these genres to create unique and eye-catching images.
Another way to find inspiration for your rim lighting photography is to experiment with different lighting setups and techniques. Play around with the position of your lights, the intensity and color of the light, and the angle at which you shoot your subject. You can also experiment with different camera settings, such as shutter speed, aperture, and ISO, to create different effects.
Finally, don’t be afraid to get creative and think outside the box. Consider using unconventional objects as your subject, or experimenting with unique compositions and angles. Remember, the key to great rim lighting photography is to push the boundaries and create something truly unique and memorable.
Shooting Rim Lighting Photos in Different Environments: Tips and Techniques
Shooting rim lighting photos in different environments can provide unique challenges and opportunities. Outdoor settings offer the advantage of natural light, but weather and other uncontrollable elements can pose difficulties. Indoor settings allow for more control over the lighting, but may require additional equipment.
To shoot rim lighting photos in different environments, consider the location and the type of lighting available. If shooting outdoors, be aware of the sun’s position and how it affects the lighting. Use reflectors and diffusers to control the single light and create the desired effect. If shooting indoors, experiment with different light sources and positions to create the desired rim lighting effect.
In addition to lighting considerations, be mindful of the setting itself. Incorporating elements such as architecture, nature, and props can enhance the overall composition of the photo. Pay attention to the background and foreground to ensure they complement the subject and the rim lighting.
Overall, shooting rim lighting photos in different environments requires experimentation and adaptation to the specific conditions. With careful planning and attention to detail, photographers can create striking images in a variety of settings.
Tips for Shooting Action Shots with Rim Lighting: Strategies and Techniques
When it comes to shooting action shots with rim lighting, there are a few key tips to keep in mind. First and foremost, it’s important to have a fast enough shutter speed to capture the motion without any blurring. Additionally, it’s helpful to use continuous lighting instead of flash to avoid any lag time.
Another important consideration is the positioning of the lights. When shooting action shots, you’ll likely need to adjust the placement of the rim lights to ensure they’re still illuminating the subject as they move. It may also be helpful to use a wider aperture to allow for more light to reach the sensor and freeze the action.
Finally, communication with your subject is key when shooting action shots. Be sure to give clear directions and ensure they understand the timing and positioning needed for the shot. With these tips in mind, you’ll be able to capture dynamic action shots with stunning rim lighting effects.
Shooting Rim Lighting Photos with Multiple Light Sources: Tips and Strategies
When shooting rim lighting photos with multiple light sources, it’s important to consider the balance and placement of the lights to achieve the desired effect. Using a combination of soft and hard light sources can help to create depth and texture in the image.
It’s also important to consider the color temperature of the light sources and how they will affect the overall color balance of the image. Using gels or adjusting the white balance settings can help to balance the different light sources.
Additionally, using light modifiers such as flags or grids can help to control the spread of light and prevent unwanted spill.
Using Rim Lighting Techniques for Creative Portraits: Tips and Ideas
Rim lighting can add a dramatic and creative element to portrait photography. By using techniques like hair lighting, halo effect, and separating the subject, you can elevate your photos to a new level. When shooting rim lighting photos, it’s important to consider the environment, lighting sources, and subject’s movements to get the desired effect.
Additionally, finding inspiration from other photographers, experimenting with different angles and compositions, and using post-processing techniques can help you create stunning and unique photos.
Remember to have fun and be creative when shooting rim lighting photography. With practice and patience, you can master these techniques and produce breathtaking portraits that stand out.